Me and my fabulous son, Max

Me and my  fabulous son, Max
Powerscourt, Ireland

Friday, October 28, 2016

Third Annual Fairmont Town Council Tire Clean-Up

Ed & Barbara Rogers, Dave Hyatt and Larry Dunworth


Third Annual Fairmont Town Council Tire Clean-Up

Living in a rural community in Northwest Los Angeles County is fantastic...for the most part.  The views are breath taking, the skies are clear.  During the day you can see for miles and at night there are more stars than you can count.  It is peaceful and tranquil.  We live in the community of Fairmont, which is about 25 miles from Lancaster to the East and 25 miles from Gorman to the West, on the Los Angeles--Kern County line.

Skies in Fairmont are spectacular

The only scar on a mostly perfect place is that not-so-nice people use this beautiful desert as a dumping ground for all sorts of trash.  Los Angeles County is a very large and diverse place.  Over half of the county is rural.  There is a lot of ground to cover and the county Public Works Department simply cannot keep up with the illegal dumping that takes place in our deserts.

Desert trash and tires in Fairmont.
It is fortunate that the county has several programs to help mitigate the trash.  They offer free dump days for MATTRESSES,TIRES and household waste.  They provide a dumpster to rural communities for clean up days.  The Fairmont Town Council partnered with Public Works back in July to provide a place for residents to bring their over-sized trash.


Flyer from July's Clean up Event

Free permit to recycle 10+ tires
This month the LA County Public Works Department is offering a free tire recycling day on October 29th.  The Fairmont Town Council has participated in this free event the past two years and is participating this year as well.  If you have more than 10 tires you would like to recycle, the County requires a free permit.  It takes a little advance planning but the permit is free.

Council members Larry Dunworth and Barbara Rogers finding tires

Council members Larry Dunworth and Dave Hyatt


So with our permit in hand, our ragtag band of volunteers, aged 50 to 75 scoured the desert in the northeast portion of Fairmont and collected tires.  There were a total of five of us today, three members of the Town Council and two community members.  So how did I get roped into this?  My husband is on the Fairmont Town Council.  He's a great guy and I like being married to him.

Fairmont Town Council Members Larry Dunworth and Dave Hyatt

We focused today's efforts in the Northeast area of our community.  Unfortunately, there are many dump sites to choose from.  We collected tires from two large collections and picked up a few along the way.  Many of the tires, were off the beaten path, but we tried to get at all the tires we could!

Fairmont Town Council President, Barbara Rogers

Marti Lindsey even got into the act...only small tires for me
 Many of the tires were half buried or filled with sand, which made the process a little more difficult, but not impossible.We were extra careful, because snakes like to hide in the brush among the refuse.  The Mojave green is native to our area and the most poisonous snake in North America.

Larry working to remove sand from a tire

Ed Rogers filling up the dump trailer

We filled up Ed Rogers' fourteen foot dump trailer with over fifteen cubic yards of tires for recycling.  We forgot to keep an exact count, but I think there are close to 100 tires in there!

Larry and Ed congratulating each other on a job well done

Dave Hyatt throws another tire on
As the caravan made its way to the next locale, Dave's eagle eye spots several more tires along the road.  The rest of us use the trailer doors, Dave uses his amazing strength to just toss the tire over the top!  We also  had to stop so that Ed could balance the load.  Larry also has a serious case of "Trailer Envy"...just look at the size and majesty of Ed's dump trailer!

Stopped along 190th Street, West 

Ed Rogers, Barbara Rogers, Dave Hyatt & Larry Dunworth
So is the desert clear of tires?  Not by a long shot, but as volunteers we made a dent in the amount out there.  The ultimate solution would be to prevent people from dumping in the desert, but for now, all we can do is to try and clean up our little piece of paradise, a few tires at a time.

Cheers for now!
Marti

UPDATE:

Saturday, October 29, 2016

So Fairmont Town Council President, Barbara Rogers and her husband, Ed Rogers took the tires to one of the designated drop off points on Saturday morning.  There were 80 tires in the load, containing some rims and over-sized tires.  Thanks to all the volunteers for their collection and to Barbara and Ed for taking the tires in for Recycling!

Ed Rogers dropping off the collected tires.


Dump trailer doing its job...dumping tires

Until next year's Fairmont Town Council's Fourth Annual Tire Cleanup!

Cheers for now~
Marti

Wednesday, October 26, 2016

Our Brush With an Extraordinary Woman, Miss Lisa Hannaman


Max headed to his first day of 6th Grade!


October is Down Syndrome Awareness month.  This year, like all other years, I start out trying to bring attention to something positive related to down syndrome every day.  I start out strong...I mean well, but then life happens and my focus on Down syndrome awareness goes by the wayside.

This year, an old friend from High School posted a video on my facebook page about the first teacher in Argentina with Down syndrome.  How amazing, right?  My friend, Carol Magarino posted about the first teacher in Gaza with Down syndrome.  Groundbreaking, right?

Then I began to think back and realized that 9 years ago, when Max was in the Infant Toddler program at Alcott Elementary in the San Diego Unified School District, that he had a teacher with Down syndrome, Miss Lisa. I began to wonder about Miss Lisa.  What is she up to?  Is she still teaching?   Is she still socially active?

I wrote an article about Miss Lisa in October of 2007 and I'll share it below.

I'd like to first let you know that 9 years later, Lisa Hannaman is STILL working for the Infant Toddler program at Alcott Elementary.  She has been working with children at San Diego Unified for OVER 20 YEARS!  So while these stories that friends are sharing with me are amazing, in comparison they make Miss Lisa's story all the more extraordinary!

If you live in San Diego, Lisa Hannaman is legendary.  I reached out to see if anyone could tell me what Miss Lisa was up to these days.  Jamie Bisant let me know that her son is in Lisa's class this year and offered this bit of info:

She was at the buddy walk with her boyfriend (who has autism) she said she's never dated a boy with Down syndrome. And she broke of with her last boyfriend because he wasn't nice to his mom!! Love it!!! There's a lot of typical girls who should take notes 


Lisa with Max in 2007

Lisa with Joey Bisant this year at Alcott
Here is the story I did 9 years ago.  She is still an inspiration and living proof of what is possible for individuals with Down syndrome:

Lisa Hannaman--Living on Her Own
by Marti Lindsey

Lisa Hannaman’s face lights up when she talks about her job. When asked what her favorite part of working in Alcott’s Infant Program is, she beams and says, “Playing with the children!” Lisa Hannaman is an adult with Down syndrome. She lives independently and has worked for the San Diego Unified School District for over twelve years.

Lisa is a shining example of the endless possibilities our children possess. Lisa is in her early thirties. She has lived in an apartment in Mira Mesa since 2000. She rides the City bus to her job in Clairemont Mesa five days a week. The bus ride is about an hour, with a fifteen minute walk to her job at Alcott.

Lisa started her career at Erikson Elementary working with the preschool program. After four years at Erikson, Lisa transferred to Alcott where she has been working with children in the zero to three program for the past eight years.

When asked about her duties at Alcott, Lisa replies, “I get snacks and lunches. I play with children and put them in circle. For me it’s easy.” Circle time is when young children come together for a lesson where they sit together in a circle formation. If you’ve ever tried to get twelve two year olds to do something, you know it’s not easy.

Outside of work, Lisa’s life is much like any other single gal in San Diego. She does her own grocery shopping, laundry, cooking and cleaning in the apartment she shares with a roommate. “It’s not really my favorite part,” Lisa says about the cleaning. Her favorite color is purple, which she used to decorate her bathroom. Her signature dish is “Apricot Chicken.”

Lisa enjoys taking a weekly class in line dancing, followed by a dance party each Saturday in Carmel Mountain. She enjoys painting, yarn crafts, watching the San Diego Padres and going to the movies. Julia Roberts is her favorite actress. “I don’t care what she’s in; I’ll watch it,” says Lisa.

Lisa enjoys listening to Billy Joel, Shania Twain and Kelly Clarkson on her I-pod. Not surprisingly, she enjoys watching American Idol, much like any other young woman her age.

Lisa’s mom, Beth Hannaman says, “She’s in charge of what she wants to do. She has shown us that she makes good decisions.” Lisa’s family is very involved in her life. Lisa also has a coach, Julie Burcher, provided by the San Diego Regional Center. Julie helps Lisa with her finances and offers support wherever needed. Lisa mostly uses a debit card for her purchases and writes checks for her bills.

Lisa was recently appointed a “Global Messenger” for the Special Olympics. Lisa participates in Soccer, Sailing, Softball, Track and Field, and Ice Skating for the Special Olympics. “2005 was the year of Lisa,” says her mother, Beth. Lisa won a Bronze medal in Ice Skating at the World Winter Games in Japan. That same year Lisa was awarded the Classified Employee of the Year by the San Diego Unified School District.

As you can see, Lisa leads a full life. Her mother, Beth, said that Lisa would like to be married. When I asked Lisa about what she would look for in a husband, she said, “He has to like everything about me and be nice to my friends.” That sounds like any thirty-something woman to me.


Sunday, April 5, 2015

Candied Jalapenos--Also Known As Cowboy Candy

Cowboy Candy--Candied Jalapenos--YUM!


One of the easiest and most delicious things that I've canned is Cowboy Candy, also known as Candied Jalapenos.  I grow lots of peppers, so I've adapted a recipe shared in my Grow LA Victory Garden class by my fabulous neighbor and Master Food Preserver, Nancee Siebert.  She initially got the recipe from the website SB Canning.


I started by washing and drying 2 pounds of jalapeno peppers.  You can add red or yellow for color but all I had was green.


Next, I sliced all the peppers in 2" pieces.  The larger the chunks of pepper, the better they look in the final product.


Next I made the Pickling Liquid by combining:
1 cup Apple Cider Vinegar (can use regular vinegar or a combination)
2 cups of sugar
1 tbs mustard seed
1 tbs dry mustard
1 tsp tumeric
1 tsp celery seed
1/2 tsp cayenne pepper
1 head garlic using garlic press (can use 2 tbs garlic powder as substitute

Combine and bring to a boil, then simmer for 5 minutes.  Then add jalapenos and simmer for 5 more minutes.


Now a bit about canning.  First, always follow safe food preservation practices.  The USDA has the best and most up to date information.  Start with a clean kitchen, clear of clutter.  I like to wipe my counters down with a dilute bleach and water solution before starting.  Although the canning process is designed to kill any stray bacteria, I like to think I'm doing my best not to add any into the process.

21.5 quart--used to process, 12 quart--used to sterilize, 6 quart--used for pickling liquid

Sterilized jars, lids, funnel, jar lifter, headspace tool, dishtowels are ready to go

The tricks I've learned along the way are that you need at least 1 more large pot than you think you'll need.  You'll want a pot to make your pickling liquid, a large pot of water boiling to process your jars as well as another pot to sterilize them.  I have seen people use their dishwasher or oven to sterilize, but I stick to a pot of boiling water.

Have several clean dish towels, all of your canning implements and paper towels ready at hand.


So now we are ready to process or "can" our Candied Jalapenos!  Fill your sterilized jars with peppers and liquid leaving 1/2 headspace.  Wipe the top of the jar with a damp paper towel and add lid and band tightened to secure, but not super tight.  This is referred to as "finger tight" in canning circles.


Once your jars are filled, add them to a water bath canner.  This is essentially a large pot of boiling water.  Pictured is my 21.5 quart pressure canner, but I'm using it as a bath bath canner due to it's large capacity.  Water should be 2" above the jars.  Once the water starts boiling, put the lid on and "process" (boil) for 15 minutes.

Another really helpful tip learned from Nancee is how to be patient.  After processing for 15 minutes, turn off the flame.  Wait 5 minutes and take off the lid.  Wait 5 more minutes and remove the jars from the pot and place on clean dish towels.  It is important not to disturb the jars until they are cool and have sealed.  You will hear the distinctive "pop" as the jars vacuum seal.  Nancee's method of "Wait 5 minutes between every step" ensures you are not impatient, thus ruining your hard work.


This recipe yielded 5 1/2 pints of Candied Jalapenos.  They really do get better with time.  Wait at least 4 weeks before using them.  The time mellows the flavors and it is worth the wait!!


Now the really important part....how to use them!  First, you can eat them right out of the jar.  They really are that good.  I also make a pinwheel out of a flour tortilla, cream cheese and the cowboy candy.  They are excellent with cheese and crackers.  I serve them with any Mexican Food dish.  They are great as a condiment on hamburgers or hot dogs.  I hope you enjoyed this post on fabulous candied jalapenos!

Cheers~
Marti


Sunday, February 8, 2015

Maintaining a Windbreak--Part 1

Maintaining a Windbreak--Part 1--Filling in the Gaps


Windbreak and new trees on right
We live in the West Antelope Valley, in a transition area from foothills to the Western edge of the Mojave desert.  It is windy out here...I mean really windy.  We regularly have sustained winds of over 30 mph.  Gusts up to 70 mph are not unheard of.  What this means is that an adequate wind break is a must.  A windbreak is essentially a line of trees on the side of your property where the prevailing winds come from.  In our case, it's the Western boarder of our property.

Loading the trees into the truck 
We took advantage of a dust mitigation program offered by neighboring Solar facilities, Mid America Solar and S Solar, which offered area residents 10 free trees.  We decided to use these trees to fill in the holes in our windbreak. 

Water delivery
We picked the trees up in mid December and placed them near where we plan to plant them.  Since we have not added irrigation lines or water to the back portion of our property, we have been watering the trees using 20 gallon tubs and 2 gallon buckets run from the back of the truck.  Not the easiest way to water, but it gets the job done.

Fabulous husband getting started

Figure out where your gaps are in the windbreak and decide where to place your tree.  Since the trees are super heavy, it's best to use the container to gauge your placement and the depth of the hole.

Not quite deep enough
Once the hole was deep and wide enough, we added a bit of composted horse manure to feed the tree.  Since the previous owner of our ranch raised thoroughbred Arabians, there is no shortage of this around here!  We added about a gallon of water and then placed measured using the planter to be sure.

Depth of hole equals correct depth to plant

Low tech irrigation 

We took the tree out of the container and cut the roots to loosen.  These trees had been in these pots way to long and had become root bound.  It's essential that the tree's roots be able to spread out and a tap root reach the ground water.

Making cuts to the roots to ensure growth.
Now it's time to place the tree in the hole.These weigh over 150 pounds so it took both of us.  We oriented the tree slightly into the prevailing winds and checked to make sure we were satisfied with its placement before filling the hole.

Checking depth and placement
Now it's time to refill the hole and add a support.  You can use any sturdy stick, but living on a ranch, you end up having all sorts of fence posts and rods laying around...just use what you have.

Add a support

Back fill the hole
While filling the hole, after every few feet of soil we added about a gallon of water.  This is to give them a drink as well as help our little trees be successful.  It also helps with settling and lets you know if you have any drainage issues.

Add a gallon of water several times during the fill

Finish back filling the hole

Now that the holes have been back filled, we add about 2-3 gallons of water.  We check drainage and their level to ensure the trees are where we want them.  After the trees are settled in, we will attach the tree to the support post with a piece of cloth to support our tree's growth in the wind. 

All done!

So one tree down....nine more to go!!

You might be wondering why I titled this blog post, "Part 1."  The answer to this is that maintaining a windbreak is a twofold process.  What we have been avoiding since we moved here about about a year and a half ago is cutting the dead wood from the existing windbreak trees.  This is a tough one, because even though there are large sections of some trees that are clearly dead, they still provide a break from the wind.  We don't want to remove too much.

Max with our puppies Rudy & Valentino August 2014
Like everything else in a rural setting, it's trial and error.  Living out here also forces you to do a lot of the work yourself.  It's tough to find an expert and if you can, they don't want to drive all the way out here...lol!

For more information on how to do this in your area, check your local county agricultural extension office. 

Hope you enjoyed our windbreak sage, part 1! 

Cheers for now~
Marti

Thursday, December 11, 2014

Congratulations to Me...a Certified Victory Gardner!

Handbook for the Grow LA Victory Gardening Course


I have grown some of my own food for as long as I can remember.  My parents had a garden as did my grandparents before them.  I guess that being from the South, it's just expected that in the summer, you at least plant some tomatoes.

San Diego no effort garden of snap peas, tomatillos, tomatoes

When we moved to our property last year, we had a huge wake up call when trying to grow.  In San Diego, things just grew.  Here in the West Antelope Valley, we had to contend with many new conditions:  the on-going drought, exceptionally low humidity, the wind and the critters. Oh what critters we have:  jackrabbits, ground squirrels, gophers, birds, coyotes...and they're all hungry!


When I found out about the UC Cooperative Extension's Grow LA Victory Garden Initiative I was happy to see that they offered local classes.  I signed up for Master Gardener Susie Bowman's 4 week class held in the community garden at the Lutheran Church of the Master in Lancaster.  Finally I could round out my life long gardener's knowledge with local expertise!

We started by talking about what grows well in our climate in the Antelope Valley.
We talked about seeds, resources, and then got right to business...the garden!  Since it was Fall, we cleaned out some of the spent summer crops in the raised beds.  Then we planted some established starts that hold up to Fall & Winter growing:  artichokes, broccoli, garlic and onions.  I love that we got some hands on experience and were able to ask questions as we went.

Master Gardener Susie Bowman working in the raised beds

 
Irrigation and timer supplied by community gardener

We had homework for the next class.  We were asked to bring in a soil sample from our home garden.  So our second class focused heavily on soil.  Our instructor, Susie, brought in her "pet" worms and did a unit on vermicomposting.  It was fascinating.  The surprising part was the compost didn't have a foul odor....it smells of fresh soil.

Jar of soil with alam and water added---shake!
Soil from my garden
Now for the fun part.  We did a soil composition test with the dirt we brought in from our home gardens.  We added water and 2 tablespoons of alum and shook it all up.  An hour later the soil separated into layers of sand, clay and organic matter.  Fascinating stuff!

The other members of the class were also a wealth of knowledge.  The following class we all (without prior discussion!) brought in unique things we have grown and saved seed to share with the rest of the group.  Next year I am looking forward to growing Fairy Tale Eggplants from Tamara Coombs Antelope Acres garden!

Our last class was a blast.  It was titled, "Preserving the Harvest" and included another Master Gardner who is also a Master Food Preserver, Nancee Siebert. 

Tamara, Nancee and Susie getting the supplies ready
This was a full day of all types of preserving.  We started with fresh kale in the food dehydrator and made kale chips.  What a pleasant surprise....very tasty.  Our next task was to grate and bag zucchini to preserve in 2 cup servings the freezer.


Tamara added pectin and now stirring tomato jam
The more technical but rewarding part of the class was pressure canning and canning by water bath methods of preserving.   Most of us had canned before, but having a Master Food Preserver lead the class was really helpful!  Nancee pointed out some bad habits that some of us had picked up along the way.  Now we are confident that we can safely preserve our harvest!


Pressure canned green beans and tomatoes
The practice of patience when preserving food cannot be overstated.  We pressure canned fresh tomatoes and green beans.  Following each step and not taking short cuts really produced some beautiful canned foods.

Preserving the harvest with Nancee Siebert

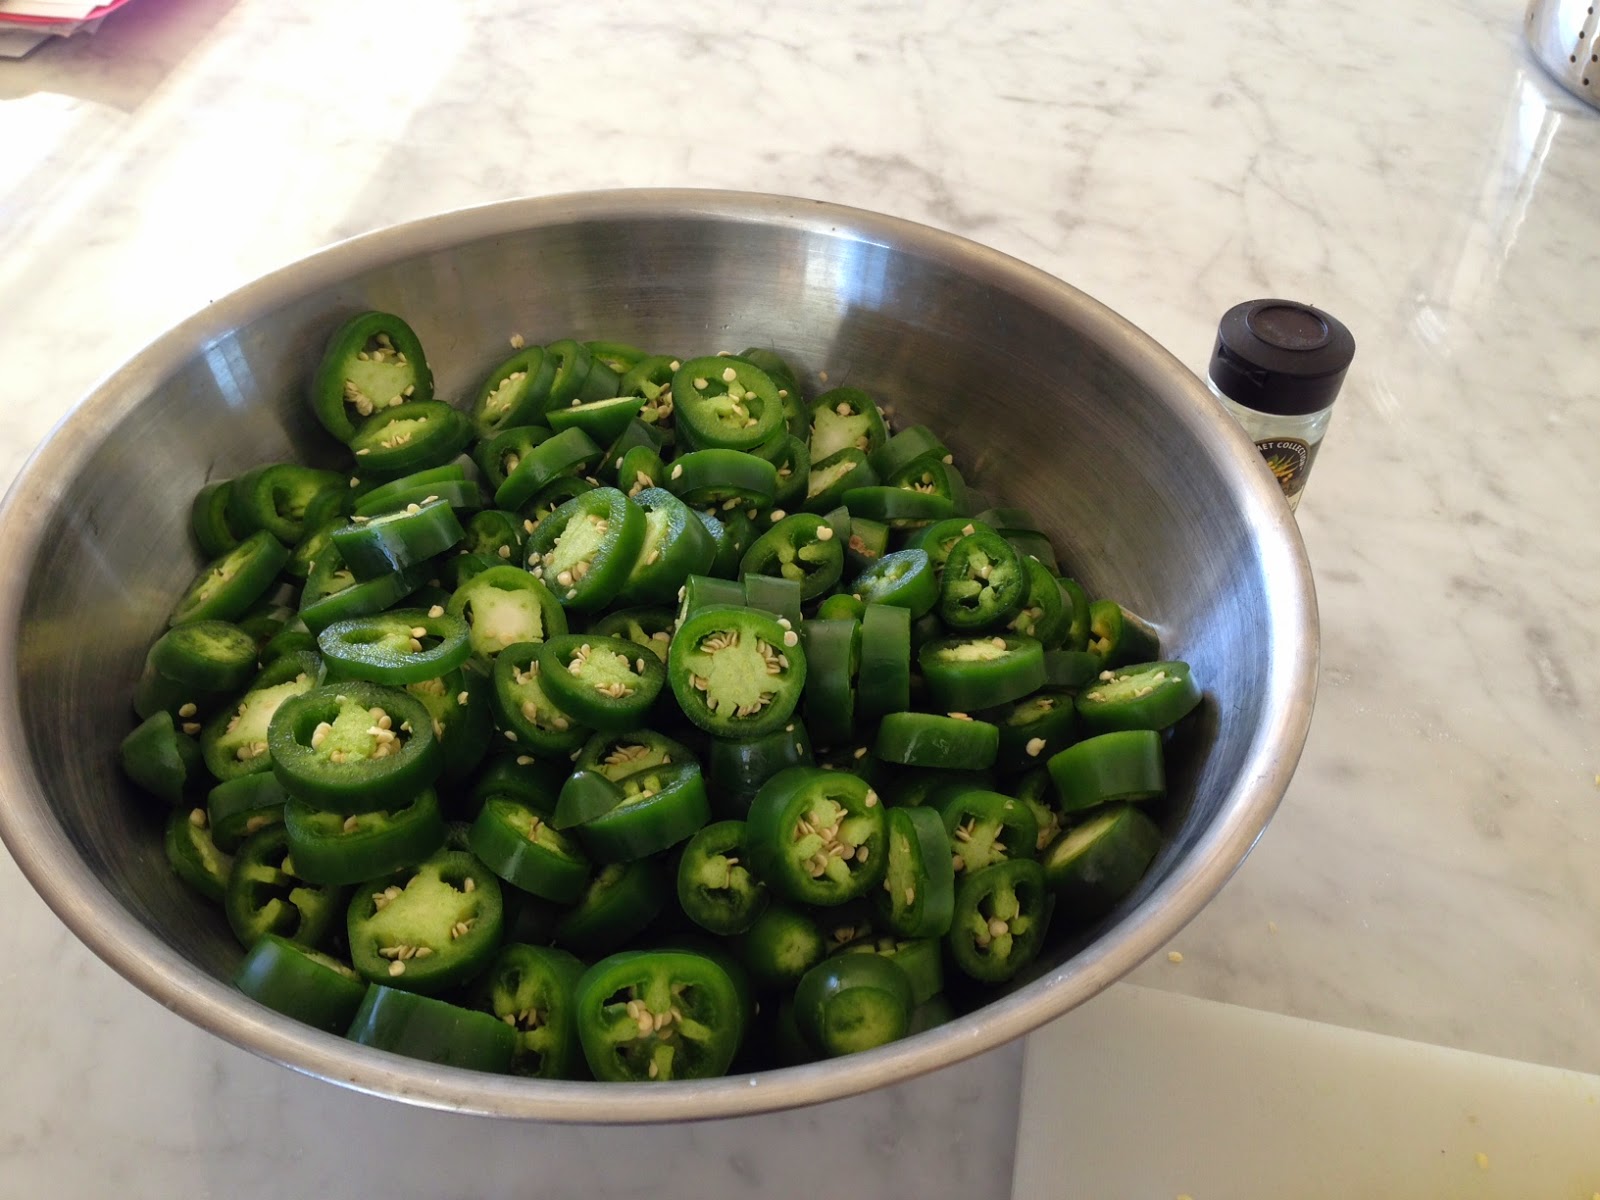
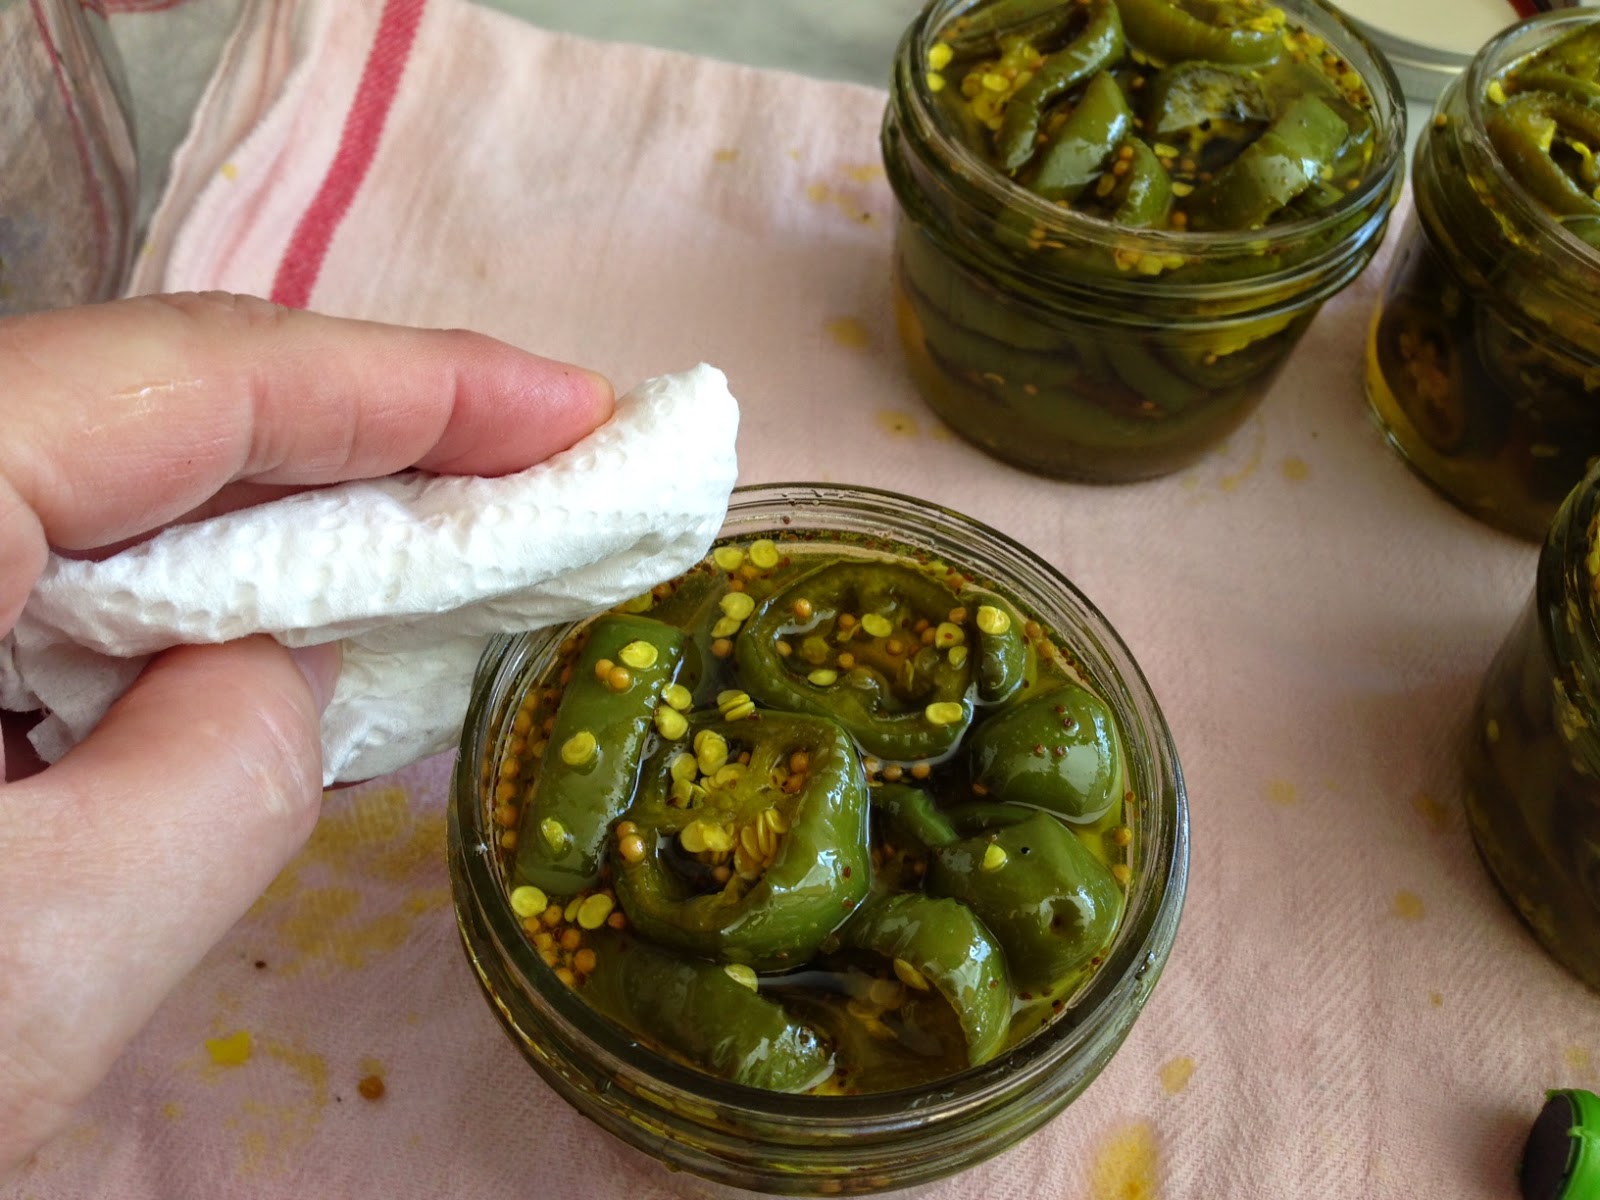
We used the hot water bath method of preserving to make Cowboy Candy (candied jalapenos), Tomato Jam, cold pack tomatoes.  Although it was a lot of work, many hands make the task go quickly!

Nancee, Susie & me with the bounty of the day!
The best part of the day is that we got to take home canned tomatoes (2 ways), green beans, tomato jam, cowboy candy and frozen zucchini.  We ate all the kale chips...haha!

So overall, the Victory Garden class was a fantastic experience!  I learned a lot, met some great new people and have a new sense of community.  Although the class I took was comprised of more experienced gardeners, people of all experience levels and abilities would benefit from taking this class.  I highly recommend it!

Cheers~
Marti