Me and my fabulous son, Max

Me and my  fabulous son, Max
Powerscourt, Ireland
Showing posts with label Gardening. Show all posts

Sunday, April 5, 2015

Candied Jalapenos--Also Known As Cowboy Candy

Cowboy Candy--Candied Jalapenos--YUM!


One of the easiest and most delicious things that I've canned is Cowboy Candy, also known as Candied Jalapenos.  I grow lots of peppers, so I've adapted a recipe shared in my Grow LA Victory Garden class by my fabulous neighbor and Master Food Preserver, Nancee Siebert.  She initially got the recipe from the website SB Canning.


I started by washing and drying 2 pounds of jalapeno peppers.  You can add red or yellow for color but all I had was green.
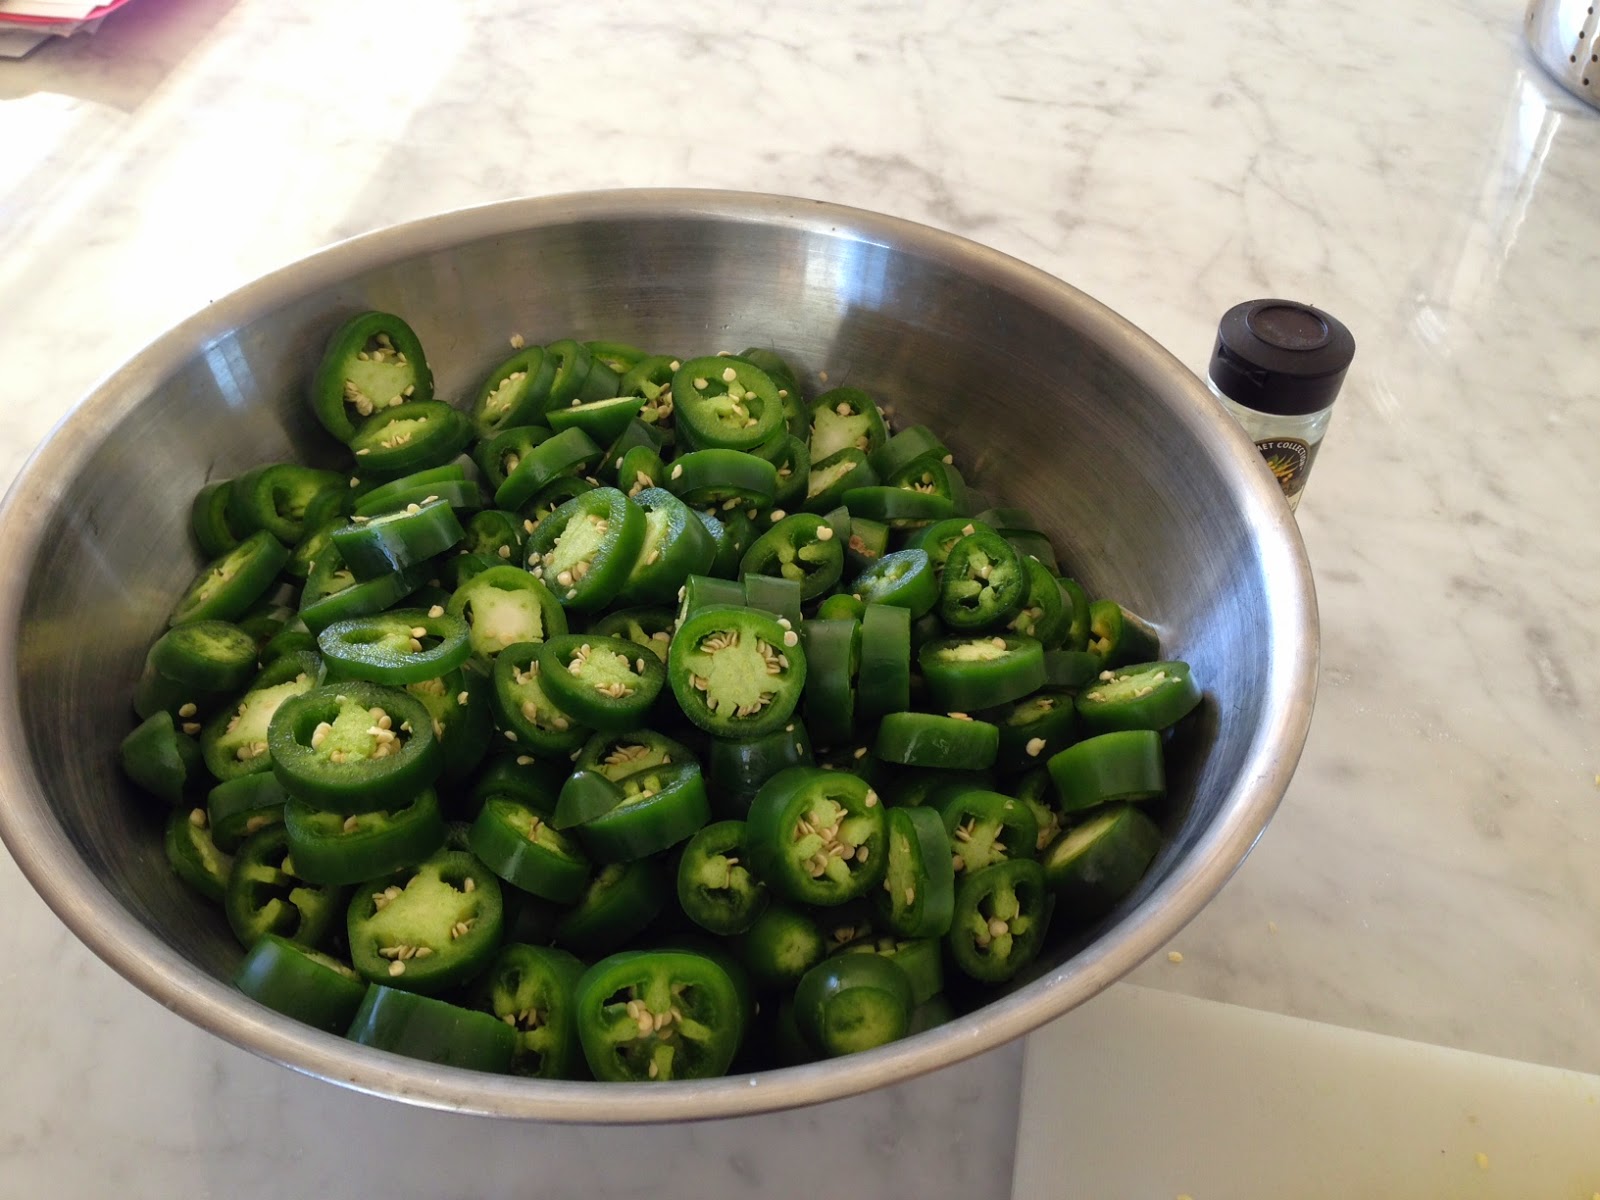


Next, I sliced all the peppers in 2" pieces.  The larger the chunks of pepper, the better they look in the final product.


Next I made the Pickling Liquid by combining:
1 cup Apple Cider Vinegar (can use regular vinegar or a combination)
2 cups of sugar
1 tbs mustard seed
1 tbs dry mustard
1 tsp tumeric
1 tsp celery seed
1/2 tsp cayenne pepper
1 head garlic using garlic press (can use 2 tbs garlic powder as substitute

Combine and bring to a boil, then simmer for 5 minutes.  Then add jalapenos and simmer for 5 more minutes.


Now a bit about canning.  First, always follow safe food preservation practices.  The USDA has the best and most up to date information.  Start with a clean kitchen, clear of clutter.  I like to wipe my counters down with a dilute bleach and water solution before starting.  Although the canning process is designed to kill any stray bacteria, I like to think I'm doing my best not to add any into the process.

21.5 quart--used to process, 12 quart--used to sterilize, 6 quart--used for pickling liquid

Sterilized jars, lids, funnel, jar lifter, headspace tool, dishtowels are ready to go

The tricks I've learned along the way are that you need at least 1 more large pot than you think you'll need.  You'll want a pot to make your pickling liquid, a large pot of water boiling to process your jars as well as another pot to sterilize them.  I have seen people use their dishwasher or oven to sterilize, but I stick to a pot of boiling water.

Have several clean dish towels, all of your canning implements and paper towels ready at hand.
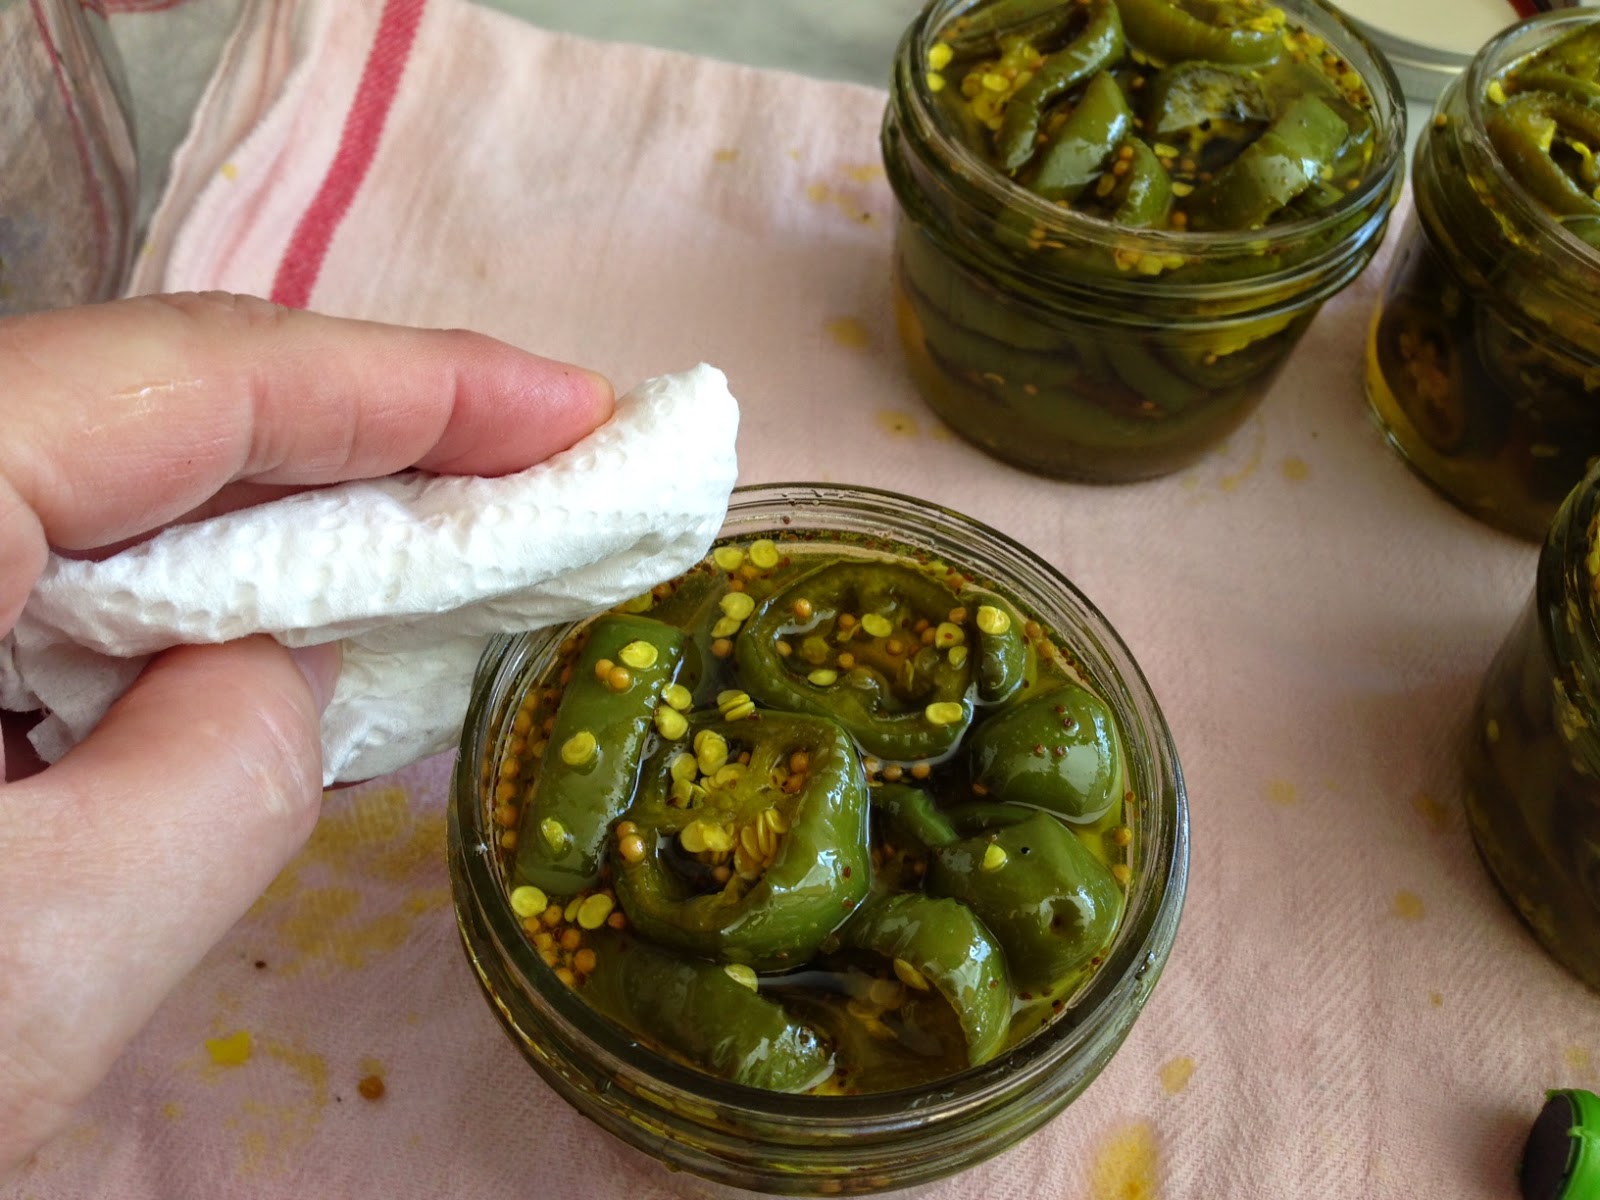

So now we are ready to process or "can" our Candied Jalapenos!  Fill your sterilized jars with peppers and liquid leaving 1/2 headspace.  Wipe the top of the jar with a damp paper towel and add lid and band tightened to secure, but not super tight.  This is referred to as "finger tight" in canning circles.


Once your jars are filled, add them to a water bath canner.  This is essentially a large pot of boiling water.  Pictured is my 21.5 quart pressure canner, but I'm using it as a bath bath canner due to it's large capacity.  Water should be 2" above the jars.  Once the water starts boiling, put the lid on and "process" (boil) for 15 minutes.

Another really helpful tip learned from Nancee is how to be patient.  After processing for 15 minutes, turn off the flame.  Wait 5 minutes and take off the lid.  Wait 5 more minutes and remove the jars from the pot and place on clean dish towels.  It is important not to disturb the jars until they are cool and have sealed.  You will hear the distinctive "pop" as the jars vacuum seal.  Nancee's method of "Wait 5 minutes between every step" ensures you are not impatient, thus ruining your hard work.


This recipe yielded 5 1/2 pints of Candied Jalapenos.  They really do get better with time.  Wait at least 4 weeks before using them.  The time mellows the flavors and it is worth the wait!!


Now the really important part....how to use them!  First, you can eat them right out of the jar.  They really are that good.  I also make a pinwheel out of a flour tortilla, cream cheese and the cowboy candy.  They are excellent with cheese and crackers.  I serve them with any Mexican Food dish.  They are great as a condiment on hamburgers or hot dogs.  I hope you enjoyed this post on fabulous candied jalapenos!

Cheers~
Marti


Thursday, December 11, 2014

Congratulations to Me...a Certified Victory Gardner!

Handbook for the Grow LA Victory Gardening Course


I have grown some of my own food for as long as I can remember.  My parents had a garden as did my grandparents before them.  I guess that being from the South, it's just expected that in the summer, you at least plant some tomatoes.

San Diego no effort garden of snap peas, tomatillos, tomatoes

When we moved to our property last year, we had a huge wake up call when trying to grow.  In San Diego, things just grew.  Here in the West Antelope Valley, we had to contend with many new conditions:  the on-going drought, exceptionally low humidity, the wind and the critters. Oh what critters we have:  jackrabbits, ground squirrels, gophers, birds, coyotes...and they're all hungry!


When I found out about the UC Cooperative Extension's Grow LA Victory Garden Initiative I was happy to see that they offered local classes.  I signed up for Master Gardener Susie Bowman's 4 week class held in the community garden at the Lutheran Church of the Master in Lancaster.  Finally I could round out my life long gardener's knowledge with local expertise!

We started by talking about what grows well in our climate in the Antelope Valley.
We talked about seeds, resources, and then got right to business...the garden!  Since it was Fall, we cleaned out some of the spent summer crops in the raised beds.  Then we planted some established starts that hold up to Fall & Winter growing:  artichokes, broccoli, garlic and onions.  I love that we got some hands on experience and were able to ask questions as we went.

Master Gardener Susie Bowman working in the raised beds

 
Irrigation and timer supplied by community gardener

We had homework for the next class.  We were asked to bring in a soil sample from our home garden.  So our second class focused heavily on soil.  Our instructor, Susie, brought in her "pet" worms and did a unit on vermicomposting.  It was fascinating.  The surprising part was the compost didn't have a foul odor....it smells of fresh soil.

Jar of soil with alam and water added---shake!
Soil from my garden
Now for the fun part.  We did a soil composition test with the dirt we brought in from our home gardens.  We added water and 2 tablespoons of alum and shook it all up.  An hour later the soil separated into layers of sand, clay and organic matter.  Fascinating stuff!

The other members of the class were also a wealth of knowledge.  The following class we all (without prior discussion!) brought in unique things we have grown and saved seed to share with the rest of the group.  Next year I am looking forward to growing Fairy Tale Eggplants from Tamara Coombs Antelope Acres garden!

Our last class was a blast.  It was titled, "Preserving the Harvest" and included another Master Gardner who is also a Master Food Preserver, Nancee Siebert. 

Tamara, Nancee and Susie getting the supplies ready
This was a full day of all types of preserving.  We started with fresh kale in the food dehydrator and made kale chips.  What a pleasant surprise....very tasty.  Our next task was to grate and bag zucchini to preserve in 2 cup servings the freezer.


Tamara added pectin and now stirring tomato jam
The more technical but rewarding part of the class was pressure canning and canning by water bath methods of preserving.   Most of us had canned before, but having a Master Food Preserver lead the class was really helpful!  Nancee pointed out some bad habits that some of us had picked up along the way.  Now we are confident that we can safely preserve our harvest!


Pressure canned green beans and tomatoes
The practice of patience when preserving food cannot be overstated.  We pressure canned fresh tomatoes and green beans.  Following each step and not taking short cuts really produced some beautiful canned foods.

Preserving the harvest with Nancee Siebert

We used the hot water bath method of preserving to make Cowboy Candy (candied jalapenos), Tomato Jam, cold pack tomatoes.  Although it was a lot of work, many hands make the task go quickly!

Nancee, Susie & me with the bounty of the day!
The best part of the day is that we got to take home canned tomatoes (2 ways), green beans, tomato jam, cowboy candy and frozen zucchini.  We ate all the kale chips...haha!

So overall, the Victory Garden class was a fantastic experience!  I learned a lot, met some great new people and have a new sense of community.  Although the class I took was comprised of more experienced gardeners, people of all experience levels and abilities would benefit from taking this class.  I highly recommend it!

Cheers~
Marti


Friday, October 10, 2014

Corn--The Transition from Gardener to Farmer?

 We have a lot of land that we are not using right now.

Last year I tried a large garden in our already fenced side yard, with not so great results.  We did not have any animals to deter the wildlife so everything that I planted was eaten by either a jackrabbit or a ground squirrel.  If I hadn't seen it with my own eyes, I would not have believed it...a small adult rabbit ran and jumped through the chain link fence!  That is an opening that is around 2 inches square!

For as long as I can remember, we have always grown some of our own food, so I wasn't going to be discouraged!  We got a few kittens and then added some raised beds so we could at least grown something to harvest!

Late Summer 2013--added raised beds
So these were some quick and easy beds put together by my fabulous husband, Larry.  They are untreated cedar fence posts and green, plastic construction fencing attached with a stable gun.  They worked, but not really utilizing all the space we have!

This year we decided to go bigger.  Because we live on acreage, Larry could fulfil his lifelong dream of owing a tractor.  I have to say, it makes work in the garden a lot easier.  We decided to carve out a good sized space East of the existing corral.  We have also added two enormous puppies to our family to help deter the wildlife.

Spring 2014--created a large garden area

Enclosed Garden area with 5 rolls of construction fence
Larry prepped the soil and we added composted horse manure and worked it in.
We enclosed the garden area with more of the green construction fencing and planted!  I have tried several times to grow corn. When we lived in San Diego, I would try just about every year with no luck.  Living here in the West Antelope Valley we get plenty of sunlight, so with my trusty Earthway Garden Seeder I direct seeded six 50' rows of corn. 

Con seedlings about a week after planting


Corn is progressing nicely


Mature Corn!!


A typical mid-Summer harvest--corn, jalapeno and yellow squash


We planted an organic, heirloom variety of corn called Double Standard.  The early ears we got were fairly good, but starchier than what you buy at the grocery.  I think my pallet has become accustomed to a sweeter variety of corn as more hybrid varieties of corn are sold today.

Initially I had planned to can the majority of the corn we did not eat from fresh.  We had a very busy few weeks in late August so  we did not get the corn picked soon enough.  On to plan B!

We let the corn dry on the stalk for another few weeks in the garden.  We then picked it and brought it inside to fully dry.  After it was dry, it was fairly easy to remove the dried kernels from the cobs.  As I was researching, I found several mechanized methods for removing the kernels, but I found it pretty easy to do by hand wearing gardening gloves.


Dried Corn, about a bushel

Dried corn removed from the cobs


Our harvest, preserved as dried corn
 So all in, we have three and a half quarts of dried corn, so just shy of a gallon.  I will most likely grind this up and use it to make things like corn bread and polenta.  As for next year, I'm really not sure if I'll try to grow corn again.  I'll see how I feel in the Spring!

Now the real question is, does growing corn in long rows with the help of a tractor make you a farmer?  What is the line between gardener and farmer?

Cheers for now~
Marti


Thursday, August 28, 2014

POTATO HARVEST!

From the Marti Lindsey--Garden Lady

Back in June, we planted potatoes in some regular 2 gallon pots at the preschool.  These weren't seed potatoes, just potatoes from my pantry that had started to grow eyes.  Although it is not recommended to use regular potatoes from the grocery store, my philosophy has always been that if they were growing in my pantry, that they would certainly grow in the garden!


Washing the potatoes

First we placed the pots on a small table so my tiny friends could see what they were doing.  We then dug until we found potatoes.  Because they were grown in fairly small pots, most of the potatoes were fairly small.  After the potatoes were dug out of the pots, they went to the orange washing station to be cleaned.

Tuesday's Harvest!
Out of 4 pots, we harvested 28 potatoes!!  The students had planted other vegetables throughout the summer and there were also several tomatoes and beans ready to pick.

YUMMY!

We got the potatoes inside and gave them an additional wash.  The larger ones were cut into bit sized pieces and the smaller ones were left whole.  We steamed them with some season salt and pepper and served them with lunch.  The kids loved them!!  We will most definitely be growing potatoes again.

Cheers~
Marti--The Garden Lady